Buildings
Wall Types for Water Control Building envelope experts generally speak of three or four different approaches to design of a wall for moisture control. Face seal walls are designed to achieve water tightness and air tightness at the face of the cladding. An example would be stucco applied directly to sheathing or masonry without a moisture barrier membrane such as building paper. Joints in the cladding and interfaces with other wall components are sealed to provide continuity. The exterior face of the cladding is the primary – and only – drainage path. There is no moisture control redundancy, i.e., there is no back-up system. A face seal system must be constructed and maintained in perfect condition to effectively control rain water intrusion. In general, these walls are only recommended in low risk situations, such as wall areas under deep overhangs or in dry climates. Concealed barrier walls are designed with an acceptance that some water may pass beyond the surface of the cladding. These walls incorporate a drainage plane within the wall assembly, as a second line of defense against rain water. The face of the cladding remains the primary drainage path, but secondary drainage is accomplished within the wall. This drainage plane consists of a membrane such as building paper, which carries water down and out of the wall assembly. An example is siding or stucco applied over building paper. Concealed barrier walls are appropriate in areas of low to moderate exposure to rain and wind. Rainscreen walls take water management one step further by incorporating a cavity between the back of the cladding and the building paper. This airspace ventilates the back of the cladding, helping it to dry out. The cavity also acts as a capillary break between cladding and building paper, thereby keeping most water from making contact with the building paper. An example of a rainscreen wall is stucco or siding applied to vertical strapping over the building paper. Rainscreen walls are appropriate in high rain and wind exposures. An advancement of the rainscreen technology is the pressure-equalized rainscreen. These walls use vents to equalize the pressure between the exterior and the cavity air, thereby removing one of the driving forces for water penetration (when it is pushed through cracks due to high pressure on the face of the wall and low pressure in the cavity). These walls are for very high risk exposures. Importance of an Overhang In a rainy climate, an overhang is one of the simplest and most effective ways to reduce the risk of water intrusion. An overhang is an umbrella for the wall, and the deeper the better. A survey of leaky buildings in British Columbia commissioned by Canada Mortgage and Housing Corporation in 1996 showed a strong inverse correlation between depth of overhang and percent of walls with problems. However, even a small overhang can help protect the wall, largely due to its effect on driving rain. One important benefit of overhangs and peaked roofs often not appreciated is the effect of these elements on wind pressure. Wind-driven rain is typically the largest source of moisture for walls. An overhang and/or sloped roof will help direct the wind up and over the building, which reduces the pressure on the wall and thereby reduces the force of the driving rain striking the wall. This means water is less likely to be pushed by wind through cracks in the wall. Minimize the Holes Most rainwater problems are due to water leaking into the wall through holes. If care isn’t taken to protect discontinuities in the envelope, water can leak around window framing and dryer vents, at intersections like balconies and parapets, and at building paper joints, for example. Good design detailing and careful construction is critical! So is maintenance of short-life sealants like caulk around window frames. BC Housing-Homeowner Protection Office has updated the “Best Practice Guide for Wood-Frame Envelopes in the Coastal Climate of British Columbia” originally developed by Canada Mortgage and Housing Corporation and published “Building Enclosure Design Guide for Wood-Frame Multi-Unit Residential Buildings” with extensive information on design and construction detailing. Use our Effective R calculator to determine not only the thermal resistance of walls, but also a durability assessment of the wall based on representative climate conditions across Canada. Related Publications For on-line design and construction tips, try the following:The Build a Better Home program, operated by APA-The Engineered Wood Association, runs training courses, operates a demonstration houses, and offers publications. The web site offers construction information and provides links to all relevant APA publications. Building Enclosure Design Guide: Wood-Frame Multi-Unit Residential Buildings.
Assessing and Restoration of Decay
60Sometimes it happens – wood in service suffers from decay. How can you identify decayed wood and what are the recommended actions to take? First, be sure you actually have decay. The wood may only be harmlessly discoloured, for any number of reasons. See the publication in the side bar for help if your wood is stained but you’re not sure why. If wood is badly decayed, this will be quite obvious. The wood will be softer than normal and perhaps even be breakable by hand. Decayed wood often has a colour change, either darker or lighter than normal, although this could be due to weathering or could just be a stain. The wood may display an unexpected cracking pattern, or may look stringy- this is a sign of fairly advanced decay. If fungal growth is visible on the surface, the wood has quite likely already suffered strength loss even if this isn’t visibly obvious. However, do not rely on visual cues alone. Wood can appear stained and yet be sound, or can appear normal yet have already suffered significant strength loss due to decay. Some researchers or engineers use the pick test to determine if the wood is sound. They insert the point of a knife at a shallow angle to the surface and attempt to lever up a thin splinter. If the wood splinters with longer fragments, it is likely sound. If instead it breaks or crumbles in small pieces over the blade, it could be decayed. Decayed wood breaks somewhat like a carrot snapping in half, at one section, versus the splintering along the length of sound wood. See our Biodeterioration page to learn more about the science of decay. If you are still unsure whether or not you have decayed wood, you are advised to seek help from a wood restoration specialist. How urgent is a decay problem? By the time you notice decay, the wood typically has lost substantial strength already. In cases where the decayed wood is supporting load you are strongly advised to contact a structural engineer or other appropriate expert to more thoroughly assess the problem and proceed with a repair. A small, localized and non-critical case of decay may be a do-it-yourself project under some conditions. All decayed wood should be removed. If you are unable to remove the entire affected piece, remove the decayed portion plus an additional portion of adjacent wood beyond the visible decay. A rule of thumb is to remove an additional two feet (60 cm) of adjacent wood from each side, although this will of course depend on the extent of the decay. The removal of adjacent wood is because the fungus may have extended deep into the wood beyond the area of decay and may be ready to cause more damage in adjacent sound wood. Then apply a field treatment to the remaining adjacent wood, such as a borate solution in roll-on, rod or paste form, before replacing the removed pieces. Use treated or naturally durable wood to replace the removed pieces. If damaged wood must be left in place, a penetrating epoxy can sometimes be applied as a stabilizer. In those cases and for best results in all wood repair projects we recommend you consult with a wood restoration expert. Indoors, it is extremely important that you find the source(s) of the moisture that allowed wood decay fungi to grow. If you had wood decay in a location that is supposed to be dry, then you have a leak or a condensation problem that needs fixing to prevent any future problems. Look for primary and secondary sources of moisture. A short term leak may have allowed decay to start, for example, and condensation may be sustaining the decay. If the location of the decayed wood was outdoors or in a wet location, you need to use treated or naturally durable wood. If you have building moisture problems on a large scale, you need to hire some experts and be prepared for a potentially substantial remediation project. Seek out a qualified consultant, who will begin by using a variety of techniques and tools to determine the extent of the damage. This will include a visual examination for staining, bulging, cracking, presence of water, and warping. Subsurface moisture penetration will be tested with probes and/or thermography. In a building with wood structural members, the consultant will probably use a moisture meter to sample wetness of structural wood components in several locations. Based on the results of this investigation, the consultant will recommend a course of action for repair and future prevention. Canada Mortgage and Housing Corporation has developed a guide for building envelope rehabilitation, in two volumes: one for owners, one for consultants. More Information Click Here for a fact sheet Discolourations on wood products: Causes and Implications for help if your wood is stained and you’re not sure why. Click here for more information on biodeterioration and the science of decay. Click here for more information on remedial treatments. Click here for links on decay assessment and other durability topics
Traitabilité
Durability Guidelines
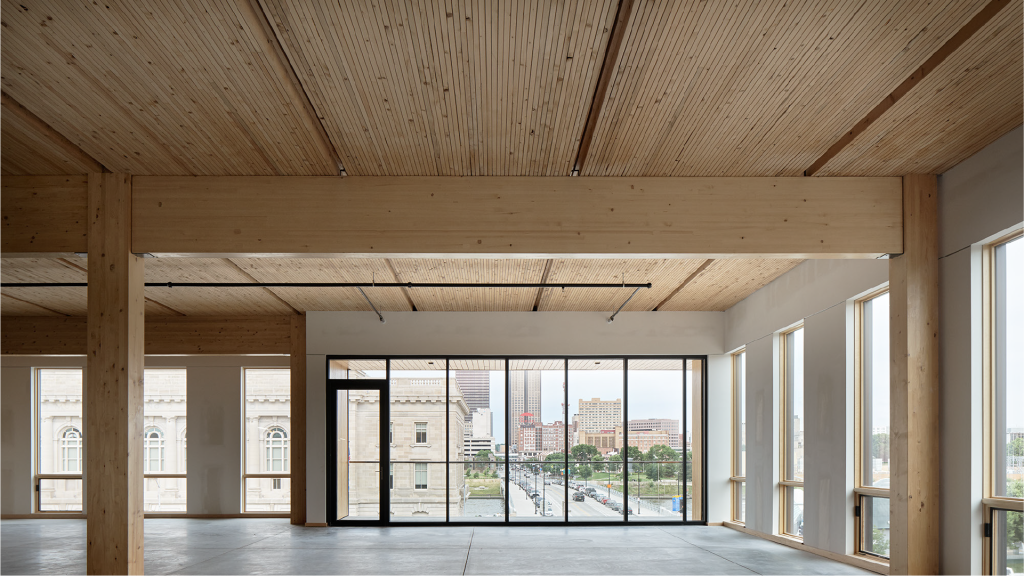
Wood structures, properly designed and properly treated, will last indefinitely. This section includes guidance on specific applications of structures that have constant exposure to the elements. Mass timber exteriors Modern Mass Timber Construction includes building systems otherwise known as post-and-beam, or heavy-timber, and cross laminated timber (CLT). Typical components include solid sawn timbers, glue-laminated timbers (glulam), parallel strand lumber (PSL) laminated veneer lumber (LVL) laminated strand (LSL), and CLT. Heavy-timber post and beam with infill walls of various materials is one of the oldest construction systems known to man. Historic examples still standing range from Europe through Asia to the long-houses of the Pacific Coastal first nations (Figure 1). Ancient temples in Japan and China dating back thousands of years are basically heavy timber construction with some components semi-exposed to the weather (Figure 2). Heavy-timber-frame warehouses with masonry walls dating back 100 years or more are still serviceable and sought-after as residences or office buildings in cities like Toronto, Montreal and Vancouver (Koo 2013). Besides their historic value, these old warehouses offer visually impressive wood structures, open plan floors and resultant flexibility of use and repurposing. Building on this legacy, modern mass timber construction is becoming increasingly popular in parts of Canada and the USA for non-residential construction, recreational properties and even multi-unit residential buildings. Owners and architects typically see a need to express these structural materials, particularly glulam, on the exterior of the building where they are at semi-exposed to the elements (Figure 3). In addition wood components are being increasingly used to soften the exterior look of non-wood buildings and make them more appealing (Figure 4). They are anticipated to remain structurally sound and visually appealing for the service life. However, putting wood outside creates a risk of deterioration that needs to be managed. Similar to wood used for landscaping, the major challenges to wood in these situations are decay, weathering and black-stain fungi. This document provides assistance to architects and specifiers in making the right decisions to maximize the durability and minimize maintenance requirements for glulam and other mass timber on the outside of residential and non-residential buildings. It focusses on general principles, rather than providing detailed recommendations. This is primarily focussed on a Canadian and secondarily on a North American audience. Click here to read more Disaster Relief Housing Shelter needs after natural disasters come in three phases: Immediate shelter: normally supplied by tarpaulins or light tents Transition shelter: may be heavy-duty tents or more robust medium-term shelters. Permanent buildings: Ultimately permanent shelters need to be constructed when the local economy recovers. Immediate and transition shelters are typically supplied by aid agencies. Light wood frame is ideal for rapid provision of medium- to long-term shelter after natural disasters. However, there are challenges in certain climates for wood frame construction that must be addressed in order to sustainably and responsibly build them. For example, many of the regions which experience hurricanes, earthquakes and tsunamis also have severe decay and termite hazards including aggressive Coptotermes species and drywood termites. In extreme northern climates, high occupancy loads are common and when combined with the need for substantial thermal insulation to ensure comfortable indoor temperatures, can result in condensation and mould growth if wall and roof systems are not carefully designed. The desire of aid organizations to maximize the number of shelters delivered tends to drive down the allowable cost dictating simplified designs with fewer moisture management features. It may also be difficult to control the quality of construction in some regions. Once built, “temporary” structures are commonly used for much longer than their design life. Occupier improvements over the longer term can potentially increase moisture and termite problems. All of these factors mean that the wood used needs to be durable. One method of achieving more durable wood products is by treating the wood to prevent decay and insect/termite attack. However, commonly available preservative treated wood in Canada may not be suitable for use in other countries. Selection of the preservative and treatment process must take into account the regulations in both the exporting and receiving countries, including consideration of the potential for human contact with the preserved wood, where the product will be within the building design, the treatability of wood species, and the local decay and termite hazard. Simple design features, such as ensuring wood does not come into contact with the ground and is protected from rain, can reduce moisture and termite problems. Building with concrete and steel does not eliminate termite problems. Termites will happily forage in a concrete or masonry block buildings looking for wood components, furniture, cupboards, and other cellulosic materials, such as the paper on drywall, cardboard boxes, books etc. Mud tubes running 10ft over concrete foundations to reach cellulosic building materials have been documented. Indeed, termites have caused major economic damage to cellulosic building materials even in concrete and steel high-rises in Florida and in southern China. Click here to read more Timber bridges Timber bridges are an excellent way to showcase the strength and durability of wood structures, even under harsh conditions, when material selection, design, construction and maintenance are done well. They could also be critical infrastructure elements that span fast rivers or deep gorges. Consequences of failure of these structures can be severe in loss of life and loss of access to communities. Durability is as critical as engineering to ensure safe use of timber bridges for the design life, typically 75 years in North America. There are numerous examples of old wood bridges still in service in North America (Figure 1). The oldest are traditional covered bridges (Figure 2), three of which are around 190 years old. In Southeast China, Fujian and Zhejiang provinces have numerous covered bridges that are almost 1000 years old (Figure 3). The fact that these bridges are still standing is a testament to the craftsmen that selected the materials, designed the structures, built them, monitored their condition and kept them maintained and repaired. They would have selected the most durable wood
Choosing and Applying Exterior Wood Coatings
Choosing a coating depends on what appearance is desired and what level of maintenance would be tolerable. For many people, the basic choice is paint versus stain. The trade-off is often between maintenance frequency and appearance. For many people, additional criteria include VOC emissions, ease of clean up, and cost. See our Links page for web sites and books with detailed information on choosing and applying wood finishes. Read our About exterior wood coatings page for an understanding of the differences between paints and stains, pigmented versus clear coatings, and so forth. Because exterior wood shrinks and swells with moisture changes, the coating needs to be flexible. Flexibility varies by product – some products may be clearly identified as suitably flexible for wood’s dimensional changes. Water-borne coatings are generally more flexible than alkyds. Coatings containing urethanes tend to be more flexible than coatings containing acrylics. For factory finishing with transparent coatings, with special considerations for UV and mildew control, please see our fact sheet Factory Finishing with Transparent Coatings: Requirements for Maximizing Longevity. Special Considerations If a coating is desired for a wear surface such as a deck or stairs, consult carefully with the coating manufacturer to choose the right product for this demanding application. All coatings will be challenged by foot traffic and increased exposure to weather in a horizontal application. High traffic routes will show wear faster than other areas. Paints and other thick film-formers may fail quickly in this situation, and a time-consuming refinishing process will be necessary each time the coating fails. Hence many people will find a stain the more convenient choice for decks and stairs. Knots may require a bit of extra care as some wood extractives or resin may leach out or bleed. Extractive bleeding can cause discolouration, but this can usually be prevented by applying special stain-blocking primers. In some species, especially the pines and Douglas-fir, knots and pitch pockets contain resin. The resin can bleed and may discolour the finish, leave hard beads of resin on the surface, or may otherwise interfere with the coating bond. The best way to prevent this is to purchase kiln-dried wood where the resin should be set (hardened and fixed in place). If painting is desired, choose higher grades of lumber as these will have fewer knots, and choose kiln-dried lumber if using a resinous species. If siding or sidewall shingles are to be painted, the US Forest Products Laboratory (USFPL) recommends they be backprimed. This application of a coating to the back side will plug the wood pores, preventing extractive bleed without blocking water vapour transmission and also preventing liquid water uptake. If possible, round out any sharp corners for best coating adhesion on these edges – for example, a square-edged stair tread will show coating degradation quickly, but bullnosed stair tread edges will retain a coating much longer. This is because a coating applied to a corner tends to pull away from the corner, leaving a much thinner layer there than elsewhere. Surface Preparation Durability of any finish is highly dependent on proper application, which includes good preparation of the surface to be coated. Specific details on surface preparation depend on what condition the wood is to begin with – read on for tips that apply to various scenarios. Surface Preparation for Fresh Wood While fresh, clean wood can be coated without surface preparation, a light sanding with 100 grit sandpaper (and dust removal) can double the service life of some water-based coatings. For best results apply a coating to a fresh wood surface as soon as possible after planing or sanding. If exposed to rain and sun for more than two weeks, adhesion of coatings will not be as good. The surface must also be free of anything that will interfere with coating adhesion, such as dirt, damaged wood fibres and moisture. Grade stamps on wood should also be removed before applying a semitransparent stain, preferably by sanding. Cleaning If there are discolourations caused by dirt, iron stains or other discolourations on the wood surface, cleaning may be desired. It is always preferable to achieve cleaning with sanding when possible. Another safe way to clean wood without damaging the surface is to simply use a garden hose, with or without a pressure nozzle. Use pressure-washing only with extreme care as it can damage wood, especially low-density species such as western red cedar. The pressure should be kept at a minimum, and never hold the nozzle in one place for a long time. If necessary, use a little bit of dish detergent, and lightly scrub (not with steel wool, as this will leave iron stains) in the direction of the grain for any stubborn discolourations. For discolourations that resist soap-and-water cleaning, chemical cleaners will be effective. The chemicals in commercial wood cleaners can be caustic soda (sodium hydroxide), sodium metasilicate, oxalic acid, citric acid, phosphoric acid, borax or some mixture. Wood cleaners containing caustic soda at a 1% – 2% solution will remove nearly all discolourations with the least damage to wood. Some acid cleaners are especially effective for removing extractive stains and iron stain. Bleach is commonly used for cleaning wood, but we do not recommend this, since a poor wood substrate will usually be left behind for subsequent coating. Resin (pine pitch) can be generally removed with mineral spirits. Please note that all acidic or alkaline chemicals need to be thoroughly rinsed off before coating. Chemicals can be toxic, corrosive and harmful, so handle all these chemicals with care and follow all manufacturer’s instructions. Surface Preparation for Aged Wood Wood coatings need a fresh surface or the coating simply won’t last. The longer wood has been allowed to weather, the poorer the coating adhesion. If a fresh surface is allowed to weather or age outdoors for more than two weeks, coating adhesion will deteriorate. This is mainly due to wood damage from sunlight. Weathered wood surfaces usually have a higher acidity, higher contact angle, and lower surface energy. Restoring an aged wood surface is necessary before applying a coating. The damaged (aged/weathered) wood fibres must be removed, exposing fresh wood. Also,
Factory Finishing
Select heartwood where possible to minimize nutrient content of wood surfaces and prevent nutrients migrating through the coating to support fungal growth on the surface. Round all corners to minimum 5 mm radius to eliminate sharp edges where coating can thin out. Prepare surface by sanding with 100 grit sandpaper to physically and chemically activate the surface. Pretreatment and coating should be applied immediately after sanding. Research shows sanding can double coating life. Pretreat with an aqueous formulation containing a UV absorber designed to absorb the visible light that must penetrate transparent coatings to permit the wood to be visible. If the subsequent coating is not completely opaque to UV light, a hindered amine light stabilizer should be added to the visible light protection system. Not only does a visible light protection system prevent degradation of the wood-coating interface, it also prevents release of lignin breakdown products that can be used as a food source by black-stain fungi and prevents light induced breakdown of the biocide components. This pre-treatment must also contain three low-dose carbon-based biocides with differing chemistries to provide cross protection against detoxification and with complementary spectra of activity providing resistance to the full range of black-stain fungi. It should ideally have water repellent properties and must maintain wood surface pH close to neutral or slightly alkaline. Apply a transparent water-based catalyzed urethane coating, containing organic and inorganic UV absorbers with absorbance that extends from UVB through to the high-energy part of the visible spectrum (violet light). The coating must virtually eliminate UV from penetrating to the wood, preventing breakdown of wood, biocides and water repellents. This coating will be formulated to be damp-wood friendly to allow application soon after pre-treatment. It will contain no nutrients for fungal growth. It must have an optimum combination of moisture excluding efficiency and vapour permeability to minimize moisture uptake and allow drying after rain. The first coat to be designed to penetrate and bond to the wood, subsequent coats to be designed to ensure maximum intercoat adhesion without sanding between coats. Sufficient coats to be applied to give a film thickness no less than 60 microns to minimize the ability of black-stain fungi to penetrate the film with their infection pegs. The surface layer to have sheeting rather than beading properties to ensure rapid drying after rain or dew, reducing the time available for spore germination. Additional detailed information on coating wood surfaces has been assembled by the Joint Coatings and Forest Products Committee (http://www.fpl.fs.fed.us/documnts/pdf2004/fpl_2004_bonura001.pdf, 2004).
Performance Factors
How long will an exterior wood coating last? Anywhere from a few months to 20 years or more, depending on the choice of product, how it was applied, and how severe the environment. Paints tend to last the longest, assuming they are applied properly (see Choosing and applying exterior wood coatings page). But the range of lifespan for a paint coating is very large. A low quality product badly applied to a weathered wood surface may barely last two years. If everything is done right, the coating might last 20 years. High quality paints and stains generally last longest, and coatings that are in locations protected from sunlight and water tend to last longer. Stains and water repellents have much shorter lives than paints, but are easier to maintain. This is one of the reasons they are a popular choice for stairs and decks. Depending on the degree of exposure to sun, water, foot traffic, and the pigment amount in the stain, expect a life of 1 to 2 years for a stain applied to deck boards and 2 to 5 for a stain applied to products that are not subject to wear. Water repellents generally last 6 to 12 months. Results from numerous tests on exterior wood finishes by many experts in this field, particularly by the US Forest Products Lab (USFPL), are summarized below. See the USFPL link for more information. Effect of wood anatomy Coatings, particularly solid colour stains and paints tend to last longer on dimensionally stable species such as western red cedar, eastern white cedar and Alaska yellow cedar, as these will shrink and swell less than other species and will therefore put less stress on the coating bond. However deck stains will not last as long on low density species such as western red cedar due to wear. Coatings last longer on wood with narrow latewood bands (the dark part of the annual ring) due to density differences between the earlywood (the light part of the ring) and the denser latewood. The southern pines are characterized by their wide bands of latewood, and therefore these species are considered to be somewhat poor for painting. The amount of extractives or resin in wood also affects coating performance. Special primers can be used to block water-soluble extractives, and kiln drying is most effective for fixing resin in wood. Nutrients in wood can migrate through the coating to support fungal growth on the surface, and heartwood can be chosen to minimize the nutrient content in wood. Effect of grain Finishes last longer on vertical (also called edge grain) versus flat grain, as these surfaces will shrink and swell less and therefore put less stress on the coating bond. However, it can be difficult to specify type of grain when ordering a product. Western red cedar and redwood may be available in a premium grade, which will likely be all heartwood, vertical grain. If using flat grain, place it bark side out or up if possible, because the grain is less likely to raise on that side, particularly in species with dense latewood bands such as the southern pines, and raised grain is a problem for coating adhesion. This is not an issue when using vertical grain products. Placing bark side out also minimizes checking. Effect of surface roughness Rough-sawn (saw-textured) or roughened wood creates a better coating bond and thicker coating buildup than smooth wood. The life of a coating can be substantially extended if the wood is roughened. Effect of sanding Sanding (100 grit) can double the life of a coating, for both weathered and freshly planed wood. This is because sanding removes any damaged surface fibres and also changes the surface chemistry to improve bonding of the coating. Effect of wood preservatives Semitransparent stains last longer when applied to CCA-treated wood – treated wood purchased prior to 2004 was probably treated with CCA. Research is under way on finishing for wood treated with new preservatives. Protection measures regarding use of treated wood apply when coating preservative-treated wood. Effect of bluestain Bluestain is caused by fungi, and bluestained wood is more permeable than unstained wood, therefore it may absorb more coating. Make sure to apply sufficient coating. Effect of weathering Sunlight quickly degrades the ability of a wood surface to bond with a coating. Research has shown a tremendous difference in paint performance on weathered versus unweathered wood. Paint on boards with no exposure to weather prior to painting lasted at least 20 years. Boards that had weathered for 16 weeks prior to painting began showing cracks in just 3 years. For maximum coating life, sand the surface if the wood has been exposed to any sunlight at all, particularly if for more than two weeks. Effect of product manufacturing Plywood: Coatings on plywood are challenged by the small cracks (face checks) on the surface that are caused by the lathe when the veneer is cut from the log during manufacturing. As the plywood goes through moisture cycling outdoors, these cracks tend to get larger and stress the coating bond. Plywood surface, edges and joints in outdoor applications should be protected, and coatings and other products for helping plywood resist cracking can be applied to prevent moisture ingress. Generally a good stain can effectively protect plywood. Since checking in stained plywood usually occurs during the first six months of outdoor exposure, best coating results can be obtained by applying a first coat and allowing any checking to occur, then six months or so later applying a second coat. Paints can fail quickly on plywood, unless efforts are made to reduce moisture uptake and also to use flexible products to accommodate dimensional changes of the wood. Roughening the surface is also important. For plywood protection and other issues with plywood, see the recommendations from the Canadian Plywood Association (http://www.canply.org/pdf/main/plywood_handbookcanada.pdf). Finger-jointed products: Coatings may perform differently on different parts of these products, as they are not likely to be uniform in grain orientation, in heartwood versus sapwood content, or even
Quick Tips
For new wood, remember: The wood must be dry. Drying time depends on a few factors. Ideally the wood should be kiln-dried (stamped “S-DRY”, “KD” or “KDAT”, see glossary of “dry lumber”). If the wood is surface wet from rain or washing, let dry 1 to 2 days. If the wood is wet through (green lumber, pressure-treated lumber not stamped “KDAT”), 2 days of drying is acceptable if using a “damp-friendly” coating. Otherwise: The wood must be allowed to thoroughly dry to a stable outdoor moisture content; about 15% in most climates. The characteristics of the wood and the climatic characteristics of its environment are so variable that drying time is hard to predict. The common way to determine wood moisture content is with a moisture meter. (Note: specific correction factors should be applied if a moisture meter is used on preservative-treated wood.) Weather conditions during coating application can affect the coating’s drying, appearance and performance. Follow the coating manufacturer’s recommendation. Coat as soon as possible after the wood has been planed or sanded. Apply finishes within two weeks of exposure, or sooner if possible (Surface Preparation for Fresh Wood). Otherwise, follow the instructions for aged (weathered) wood below. If the wood is very smooth, lightly sand it to roughen the surface with 100-120 grit sand paper. This greatly improves the coating bond. Brush free of dirt and sawdust. If painting the wood, apply a primer coat. Use an extractive-blocking primer, if needed (for example, with western red cedar or redwood) over the entire piece, or a knot sealing primer if needed (Special Considerations). When dry, apply two coats of top quality paint. For stains and water repellents, follow the instructions on the can regarding number of coats. Carefully follow the instructions on the can regarding best environmental conditions for coating, application recommendations, safety precautions and clean-up. For aged (weathered) wood, remember: For wood that has been previously coated, please read about refinishing. Clean the wood and remove discolourations such as iron stain, if desired. Expose fresh wood because coatings perform best when applied to freshly exposed wood surfaces. Allow to dry. See Surface Preparation for Aged Wood. Brush free of dirt and sawdust, and proceed with application of the coating. When maintaining or refinishing, remember: Avoid the need to refinish by keeping an eye on the coating and adding a fresh coat before the previous coat wears away, cracks or peels. This may be as frequent as every six months with water repellents, every year or two with stains, and every few years with paint (See Maintenance). Spot-treat worn areas to extend the period between full applications of a fresh coat. Sand away any failed coating and any weathered wood, and re-apply the coating (See Maintenance). If the coating has failed on a large scale, or the coating is getting too thick for refinishing, or if a change in type of coating is desired, completely strip away the old coating – please read about refinishing.
Glossary
Acrylic A type of water-borne coating product containing acrylic polymers. Alkyd A type of polyester resin. Term often used to signify solvent-borne coatings, e.g., oil paints. Backpriming The application of a finish coat to the back side of wood such as shingles or siding. Binder The non-volatile film-forming solid portion in a coating, which binds the pigment particles together after the film is dry and creates the bond with the substrate. Typical binders include alkyd resins, acrylic resins and polyurethane resins. Bleeding When the colour of a discolouration or other material works up through a coating to the surface. Commonly used to describe leaching of tannins in extractive species like western red cedar and redwood (typically happens for the first year or so if not stain blocked). Blistering When a coating forms bubbles due to air, water vapour or solvent under the film. Dry lumber Lumber which has been dried to a moisture content of 19% or less. Any 4” and thinner boards or dimension lumber surfaced at a moisture content (MC) of 19% or less may be stamped “S-DRY” and stamped “KD” if kiln-dried to a maximum moisture content of 19%. Lumber in the USA may be stamped “KDAT” if kiln-dried after pressure treatment with preservatives. Enamel Generic term for an alkyd-based pigmented coating that dries to a smooth, hard, glossy finish. The term is often more broadly used for a coating which gives a hard, stain-resistant film. Extractives Soluble chemicals particularly present in the heartwood of some species which provide the wood with resistance to decay and insects. Fungicide A substance which inhibits the growth of fungus. Often added to coatings to protect the coatings themselves from fungal growth. Latex Term used to signify water-borne paints. Lacquer Coating material characterized by rapid evaporation of the solvent to produce a thin, hard film. Linseed oil Obtained by crushing flax seeds, this natural oil can be used as a vehicle in paints, as a softening agent for the resins in varnishes, or can be used alone as a wood finish material. Raw linseed oil is a food source for fungi and must be boiled to destroy these nutrients. Most “boiled” linseed oil is not boiled but contains metallic dryers and biocides. Oil-based paints Paints using natural oils such as linseed or tung oil as the binder, with turpentine as the usual solvent. The term is now usually used to refer to paints with both alkyds and oil as the binders, and with a carrier of mineral spirits or other solvents. Paint An opaque coating generally made with a binder, liquids, additives and pigments. Applied in liquid form, it dries to form a continuous film that protects and improves the appearance of the substrate. Pigment Finely ground solids that impart colour, hiding power (opacity) and ultraviolet protection. Pitch Also called resin, this sticky substance is a mixture of rosin and turpentine and is found in most softwoods but particularly the pines, spruces and Douglas-fir. Can ooze from the pitch pockets and sometimes the knots for a year or two if not set by kiln-drying. Resin can bleed through finishes and will harden into beads, but this can be cleaned up with mineral spirits and will stop eventually. Primer The first complete coat of paint applied in a painting system. Many primers are designed to enhance adhesion between the surface and subsequent topcoats. Most primers contain some pigment, some lend uniformity to the topcoat, some inhibit corrosion of the substrate, and some stop the discolouration of the topcoat. Resin For tree resin, see Pitch. In coatings, see Binder. Sealer A liquid that seals wood pores so they will not absorb subsequent coats. Sealers may be transparent, and can act as primers. Some sealers are designed to be left uncoated. Semi-transparent stain Stain that alters the natural colour of the wood, yet allows the grain and texture to show through. The term is generally applied to exterior products, but technically applies also to interior wiping stains used for trim, furniture and floors. Shellac Alcohol-soluble, clear to orange-coloured resin derived from lac, a substance secreted by insects. Previously used as a sealer and clear finish for floors, for sealing knots, and in “alcohol-borne” primers; rarely in use anymore. Thinner is denatured alcohol. It is an environmentally friendly product and usually available from finish suppliers. Solid-colour stain Exterior stain that obscures the natural colour and grain of wood, but still allows the texture to show through – essentially, a thin paint. Stain A coating product which can either be opaque such as a solid colour stain or partly transparent such as a semi-transparent stain. Also refers to wood discolourations such as discolourations caused by tannins in wood extractives, or stain caused by fungi such as bluestain. Solvent In generic coatings terminology, refers to the volatile liquid used to improve the working properties of a coating, typically water or hydrocarbons. In “solvent-borne” coatings, refers specifically to a coating based on hydrocarbons. Tung oil Obtained from the nut of the Asian tung tree. Hardly ever used in the raw state as it dries to a non-lustrous finish. Used in varnishes. Varnish Generic term for clear film-forming finish. Transparent or translucent liquids applied as a thin film, which harden. Can be solvent or water-borne. VOC Volatile organic compound. VOCs are organic chemical compounds that have high enough vapour pressures under normal conditions to significantly vaporize and enter the atmosphere where they may participate in photochemical reactions. They are often associated with solvents, typically considered to be pollutants, and are the subject of regulations in many jurisdictions.
Codes and Standards
The treated wood you buy at your local building supplies store will have an end tag to help you choose the right product. The tag identifies the type of preservative used, the amount retained, the appropriate use for this piece of wood, and the treatment plant name and location. The most important information to look for is the use class. If the piece is going in the ground (e.g. a fence post), you need the piece to be treated for “ground contact.” All other uses (such as fence boards, deck boards and shingles) can be labeled “above ground.” The piece may also be tagged with consumer safety information. You might also find this information in the store, either posted or as a technical brochure. The National Building Code of Canada (NBC) contains requirements regarding the use of treated wood in buildings and the CSA O80 Series of standards is referenced in the NBC and in provincial building codes for the specification of preservative treatment of a broad range of wood products used in different applications. The first edition of CSA O80 was published in 1954, with eleven subsequent revisions and updates to the standard, with the most recent edition published in 2015. The manufacture and application of wood preservatives are governed by the CSA O80 Series of standards. These consensus-based standards indicate the wood species that may be treated, the allowable preservatives and the retention and penetration of preservative in the wood that must be achieved for the use category or application. The CSA O80 Series of standards also specifies requirements related to the fire retardance of wood through chemical treatment using both pressure and thermal impregnation of wood. The overarching subjects covered in the CSA O80 Series of standards also include materials and their analysis, pressure and thermal impregnation procedures, and fabrication and installation. Canadian standards for wood preservation are based on the American Wood Protection Association (AWPA) standards, modified for Canadian conditions. Only wood preservatives registered by the Canadian Pest Management Regulatory Agency are listed. The required preservative penetrations and loadings (retentions) vary according to the exposure conditions a product is likely to encounter during its service life. Each type of preservative has distinct advantages and the preservative used should be determined by the end use of the material. Processing and treating requirements in the CSA O80 Series are designed to assess the exposure conditions which pressure treated wood will be subjected to during the service life of a product. The level of protection required is determined by hazard exposure (e.g., climatic conditions, direct ground contact or exposure to salt water), the expectations of the installed product (e.g., level of structural integrity throughout the service life) and the potential costs of repair or replacement over the life cycle. The technical requirements of CSA O80 are organized in the Use Category System (UCS). The UCS is designed to facilitate selection of the appropriate wood species, preservative, penetration, and retention (loading) by the specifier and user of treated wood by more accurately matching the species, preservative, penetration, and retention for typical moisture conditions and wood biodeterioration agents to the intended end use. The CSA O80.1 Standard specifies the following Use Categories (UC) for treated wood used in construction: UC1 covers treated wood used in dry interior construction; UC2 covers treated wood and wood-based materials used in dry interior construction that are not in contact with the ground but can be exposed to dampness; UC3 covers treated wood used in exterior construction that is not in ground contact; UC3.1 covers exterior, above ground construction with coated wood products and rapid run off of water; UC3.2 covers exterior, above ground construction with uncoated wood products or poor run off of water; UC4 covers treated wood used in exterior construction that is in ground or freshwater contact; UC4.1 covers non-critical components; UC4.2 covers critical structural components or components that are difficult to replace; UC5A covers treated wood used in Coastal waters including; brackish water, salt water and adjacent mud zone. This CSA O80 Series of standards consists of the following standards, as follows: CSA O80.0 General requirements for wood preservation; specifies requirements and provides information applicable to the entire series of standards. CSA O80.1 Specification of treated wood; is intended to help specifiers and users of treated wood products identify appropriate requirements for preservatives for various wood products and end use environments. CSA O80.2 Processing and treatment; specifies minimum requirements and process limitations for treating wood products. CSA O80.3 Preservative formulations; specifies requirements for preservatives not referenced elsewhere. CSA O80.4 has been withdrawn. CSA O80.5 CCA Additives — Utility Poles; specifies requirements for preparation and use of CCA preservative/additive combinations for utility poles permitted by CSA O80.1 and CSA O80.2. For further information, refer to the following resources: www.durable-wood.com CSA O80 Wood preservation Wood Preservation Canada National Building Code of Canada Pest Management Regulatory Agency American Wood Protection Association ISO 21887 Durability of wood and wood-based products — Use classes Click here for more information on performance tests done with treated wood.
Canadian Preservation Industry
Canada has had a wood preservation industry for about 100 years. Canada is tied with the UK as the world’s second largest producer of treated wood (the USA is first, by a large margin). In 1999, the most recent year for which we have data, Canada produced 3.5 million cubic metres of treated wood. There are about 65 treating plants in Canada. As with most other industrialized countries, Canada developed a wood preservation industry using creosote, initially to service railroads (the ties holding the rails) and then utilities (power poles). Creosote production began declining by the 1950s, and by the 1970s was being somewhat replaced for these traditional uses by pentachlorophenol. Today, these oil-borne preservatives only constitute 17% of Canadian treated wood production. The remaining 83% of production uses water-borne preservatives such as CCA, ACQ and CA. The industry began its substantial shift to the water-borne products in the 1970s, as consumer interest in decks and other residential outdoor structures dramatically increased. For many years, CCA was by far the dominant preservative for both residential and industrial applications. In 2004, CCA regulations were changed such that CCA is no longer available for many residential applications. Subsequently, Canadian treaters have shifted about 80% of their previous CCA production to ACQ or CA. Most of Canada’s treated wood is used domestically; Canada exports only 10% of its production. Canada has its own wood preservation standards, supports several technical and marketing organizations, and maintains a lead position in certain areas of wood preservation research. A major focus of the industry has been in response to increasing levels of health and environmental protection regulations.
Durability Research and Development
FPInnovations has been field testing the performance of treated wood products for years. Click one of these categories for performance data from our field tests. Borate-treated Wood vs. Termites Naturally Durable Species The heartwood of species reported to have some natural durability was evaluated in ground contact (stakes) and above-ground (decking) tests. Commodity: 2×4 and 2×6 lumber from naturally durable species: Western redcedar, yellow cypress, eastern white cedar, larch, tamarack, Douglas-fir Control species: Ponderosa pine sapwood Test method: Stake test (AWPA E7) and Decking test (AWPA E25) Test sites: FPInnovations – Maple Ridge, BC; Petawawa, ON Michigan Technological University – Gainesville, Florida; Kipuka, Hawaii Date of installation: 2004-2005 Estimated service life: In the ground-contact stake test, after 5 years moderate to high levels of decay were found in all species at all sites. Yellow cypress and western redcedar were the most durable at all site. Eastern white cedar had similar durability at the Canadian and Florida sites, but was less durable in Hawaii. There were no major performance differences observed between old-growth and second-growth materials used in this study. Untreated naturally durable heartwood is not recommended for long-term performance in ground contact. In the above ground decking test, at the Canadian test sites after 10 years only small amounts of decay were observed in any of the naturally durable heartwoods tested. In contrast, the ponderosa pine controls had moderate to advanced decay. Decay was more rapid at the Florida and Hawaii test sites, with moderate to advanced decay present in all material types after 7 years. Untreated naturally durable heartwood is not recommended for long-term performance in exposed above ground applications in high decay hazard areas such as Florida and Hawaii. However, in temperate climates these naturally durable heartwoods can provide service lives greater than 10 years. References: Morris, P. I., Ingram, J., Larkin, G., & Laks, P. (2011). Field tests of naturally durable species. Forest Products Journal, 61(5), 344-351. Morris, P. I., Laks, P., Larkin, G., Ingram, J. K., & Stirling, R. (2016). Aboveground decay resistance of selected Canadian softwoods at four test sites after 10 years of exposure. Forest products journal, 66(5), 268-273.

